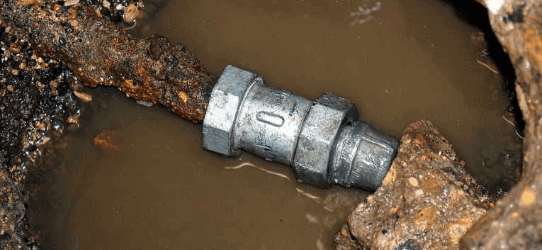
Iron contamination is a common problem for most of the home water users. It’s a big issue for households that use well water. To solve this problem, most of us use a water softener. Water softener is the two in one device to solve iron and hardness problems from home water. Some water softeners are very effective to remove water hardness. If your home water contains both iron and excess hard water minerals, then you need the best water softeners to remove iron with hardness. In this article, we are going to know about the types of iron, levels of iron contamination, negative effects of iron contamination, and the three most effective water softeners to remove iron from well water.
Iron creates rust-colored spots where it touches. When you clean your dishes or plates, it leaves sign on it. Your bathroom may look orange or reddish color. Do you know why it happens? Yes, it’s for iron, which is in your water. Iron can clog your shower head and plumbing pipes.Iron in water also effects on skin. But how to remove iron from bore well water? Yes, to remove iron from water, you need an effective water softener.
Best Water Softeners to Remove Iron: Comparison Table
| IMAGE | PRODUCT NAME | NOTABLE FEATURES | |
|---|---|---|---|
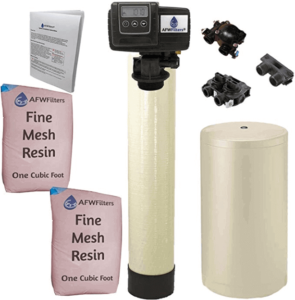 | Fleck Iron Pro-2 64,000 Grains | Capacity: 64,000 Grains Dimensions: 14X7X21 inches Flow Rate: 16 GPM | SEE LATEST PRICE ON AMAZON |
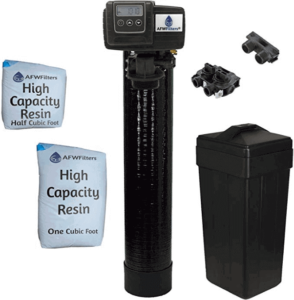 | Fleck 5600sxt 48000 Grains | Capacity: 48,00 Grains Dimensions: 27X17X62 inches Flow Rate: 12 | SEE LATEST PRICE ON AMAZON |
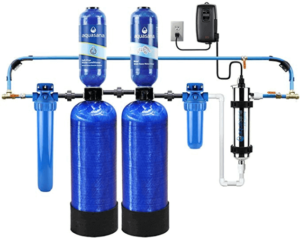 | Aquasana Rhino Whole House Filtration | Capacity: 50,000 Gallons Dimensions: 69X10.5X57 inches Flow Rate: 7 GPM | SEE LATEST PRICE ON AMAZON |
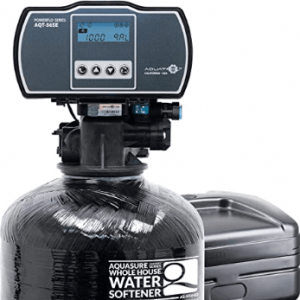 | Aquasure Harmony Series | Capacity: 64,000 Grains Dimensions: 56.5 X 30.25 X 16.5 inches Household Sizes: 7 peoples | SEE LATEST PRICE ON AMAZON |
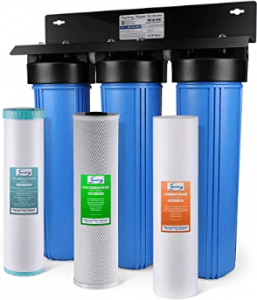 | iSpring WGB32BM Whole House Filtration System | Capacity: 1000,000 gallons Dimensions: 21X8X28 inches Flow Rate: 15 GPM | SEE LATEST PRICE ON AMAZON |
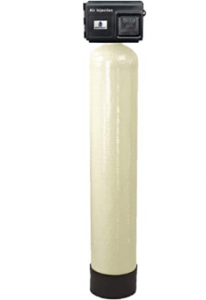 | AFWFilters AIS10-25SXT | Dimensions: 54 X 10 X 10 inches Iron removal capacity: 10 ppm Water Flow Rate: 10 GPM | SEE LATEST PRICE ON AMAZON |
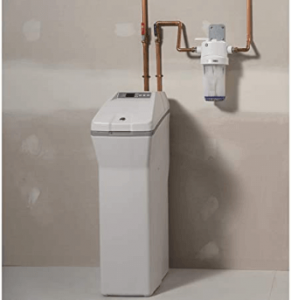 | GE GXSH40V | Dimensions: 22.44 X 14.44 X 47.63 inches Iron removal capacity: 7 ppm Water Flow Rate: 9.5 GPM | SEE LATEST PRICE ON AMAZON |
AFW Filters Iron Pro Combination Water Softener to Remove Iron from Bore Well water
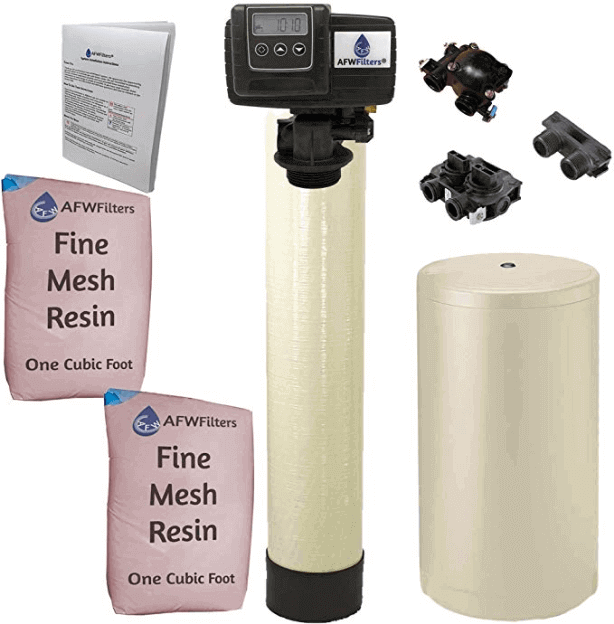
Product Features
- Capacity: 64,000 grains
- Dimensions: 14x7x21 inches
- Weight: 119.5 pounds
- Flow rate: 16 GPM
- Warranty: 5 years warranty on control head, 10 years on tank.
- Color: Almond
- Household sizes: 4-5 peoples
AFW Filters Iron pro-2 is an effective device which is produced by Fleck. Fleck is a U.S based well known and trusted company for its high-quality water softener. Iron pro-2 is a combined water softener and iron filter. You can solve both hardness and iron problems by using this water softener.
You may feel nauseous after drinking water. Iron in your drinking water is responsible for this feeling. AFW Filtersiron pro-2 can improve the taste by removing hardness and iron contaminants.
This softener system is very effective to remove both ferrous and ferric iron. It also removes sediments, sand, rust, and many other contaminants from water. If you have these problems, then AFW Filtersiron pro 64,000 grains water softener would be great for your home. AFW Filtersiron pro-2 water softener doesn’t affect the pressure of water supply because of its advanced design. If you want to remove iron along with water hardness, then you can select it. I am telling you about Iron pro-2 combination 64,000 grains water softener but, you can select 48,000 or 80,000 grains unit as you need.
AFW Filtersiron pro-2 combination water softener comes with all necessary components to install it. This system has an energy-saving fleck 5600sxt digital meter and it will save you a lot with annual energy. Fleck Iron Pro has a meter based regeneration process and that means the system will regenerate after using a certain amount of water. Fleck iron pro-2 is the best combined water softener compared to other similar water softeners.
AFW Filtersiron pro-2 water softener provides excellent warranty and tech support. It provides 5 years warranty on control head and 10 years on tanks. This system is easy to install. If you have some knowledge of the plumbing section, you can install it by following the provided instruction guide.
Pros of Iron Pro-2 Water Softener
- Fleck 5600sxt digital metered valve
- Combination of iron filtration and water softening
- 48,000 and 80,000 grains unit are available
- Fiberglass body
- High-graded resin
- Includes a bypass valve
Cons of Iron Pro-2 water Softener
- Some installation instructions are not clear
Fleck 5600sxt 48,000 Grain Water softener
Product Features
- Capacity: 48,000 Grains
- Flow rate: 12 GPM
- Dimensions: 27x17x62 inches
- Weight: 20.8 pounds
- Water consumption: 3 GPM
- Warranty: 5 years warranty on control head and 10 years on tank.
- Household sizes: 3-4 peoples
- Certification: energy star
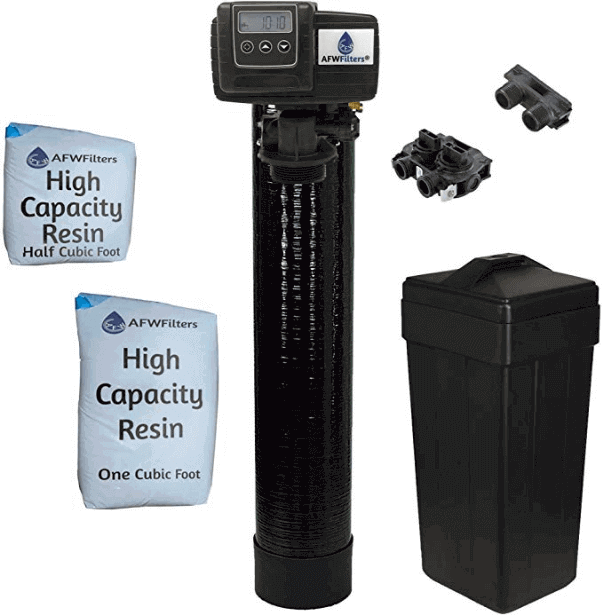
Fleck 5600sxt 48,000 grain is a high-quality water softener that is made by fleck itself. It can filter 50 grains of minerals per gallon. If your home water contains a high range of hard water minerals and iron contamination, you can select it. Fleck 5600sxt doesn’t remove only iron and minerals but also sulfur too. These iron and sulfur are responsible for bad smell. Fleck 48000 grain water softener is perfect for the small family consist of 3-4 people.
Fleck 5600sxt 48000 grains water softener uses the ion-exchange method to remove calcium, magnesium, iron, and sulfur. By removing these contaminants, it will extend the lifespan of your home appliances, clothes, and plumbing system.
Fleck 5600sxt comes with a digital on-demand control valve, a mineral tank, a brine tank with safety float, 8% cross-linked 1.5 cubic feet resin, a 1-inch bypass valve, and installation and operating guide. The included safety float will prevent accidental overfilling. The on-demand meter will control the regeneration system and the system will regenerate when it needs. The control valve has an excellent warranty of 5 years. It’s also an NSF certified product.
Pros of Fleck 5600sxt Grains Water Softener
- U.S.A made product
- Fleck 5600sxt on-demand meter
- Excellent water flow rate
- 1.5 cubic feet high graded resin
- Excellent warranty
- Safety float adjust with brine tank
- NSF certified product
Cons of Fleck 5600sxt Grains Water Softener
- No drainage tube in the package
Read related article: Best Shower Filter Consumer Reports
Best Water Softeners to remove Iron - AFWFilters AIS10-25SXT
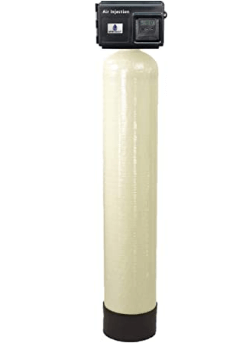
Product Features
- Dimensions: 54 X 10 X 10 inches
- Iron removal capacity: 10 ppm
- Water Flow Rate: 10 GPM
- Weight: 52 pounds
- Color: Almond or Black
- Warranty: 5 Years on control head, 10 years on tanks
This is another top-rated iron removal water softener in our list. AFWFilters AIS10-25SXT water softeners apply the oxidation method to remove iron, sulfur, manganese, and hard minerals from water.
The air injection system of this water softener uses a patented piston to complete the oxidation process inside the tank. After that, the media traps the oxidized contaminants and flushes them during the backwash cycle.
It is one of the best water softeners to remove iron. AFWFilters AIS10-25SXT water softener can remove iron up to 10 ppm, hydrogen sulfide 6 ppm, and manganese 2ppm. The water flow rate is also good and it’s 10 GPM.
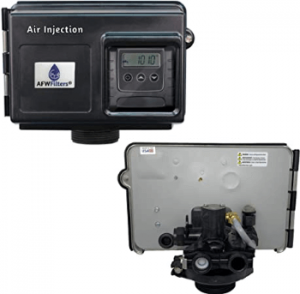
The complete system includes control head media, a stainless steel bypass valve, installation kits, and an instruction guide. Installation procedure is easy and you will get help from the instruction guide.
Pros
- Chemical-free contaminants removing
- Stainless steel bypass valve
- Single tank light design
- Easy installation
Cons
- Some consumers claimed that the customer service is poor
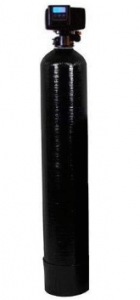
Durawater Iron Eater - Best Air Injection Iron Filter for Well Water
Product Features
- Dimensions: 10 X 10 X 54 inches
- Weight: 68 pounds
- Iron Removal Capacity: 12 PPM
- Material: Fiberglass
If the iron levels of your home water are over 8 PPM, then you should use a different iron filtration system to solve the problem. Durawater Air Injection Iron Eater water filter is the best filtration system for highly iron contaminated water.
The Durawater Iron Eater uses an oxidization method to eliminate iron from water. There is an air pocket at the top of the tank of this filtration system. When iron and sulfur contaminated water passes through the air pocket, an oxidization reaction occurs and eliminates iron and sulfur.
However, the Durawater filtration system doesn’t soften water though it removes odors of well water.
The Durawater comes with an easy installation process. If you have basic plumbing knowledge, you can do it easily. The Durawater iron filtration system also features a Fleck 5600SXT digital control valve. This valve flushes the system automatically.
Pros
- Removes iron, sulfur, and manganese effectively
- Removes iron up to 12 PPM and sulfur 10 PPM
- Automatic flushing system
- Manganese removal capacity up to 2 PPM
Cons
- Doesn’t soften water
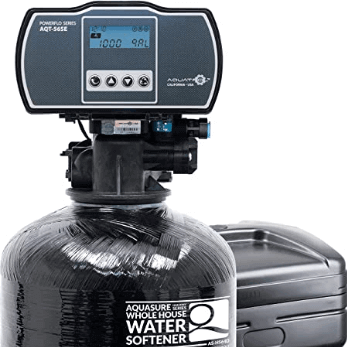
Aquasure Harmony Series 64,000 Grain Water Softener
Product Features
- Grain Size: 64,000 Grain
- Dimensions: 56.5 X 30.25 X 16.5 inches
- Weight: 149 Pounds
- Household Sizes: up to 7 peoples
- Warranty: 5 years
The harmony series comes with awesome features with customizable control head. There are 3 different sizes water softener of this series produces by Aquasure. Now, we are discussing about Aquasure harmony series 64,000 grains water softener. This water softener features three regeneration mode: time-based delayed regeneration, immediate regeneration, meter-based delayed regeneration. You can active any regeneration mode from those three options.
The harmony series 64,000 grains water softener equipped with efficient digital control head. This digital control head calculates the water usage and backwashes as needed. This type of backwashing system saves more water and salt. You can also active manual double backwashing system for cleaning, optimum regeneration, and performance.
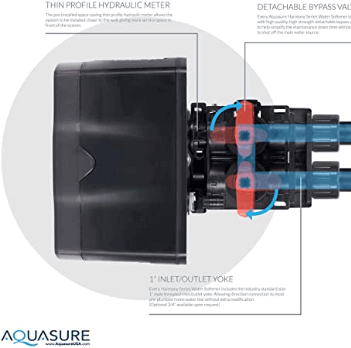
The aquasure water softeners made of durable, corrosion resistant fiberglass. This water softener comes with all equipment like digital on-demand meter, two bypasses (in and out), 1-inch male adaptor (3/4 inch also available), 5-inch brine line, 14-inch drain line, and pre-filtered premium grade resin. The harmony series 64,000 grain is perfect for the family consists up to 7 peoples.
You will get 5 years manufacturer warranty and excellent technical support. To enjoy soft, scale and spot-free water for the whole house, you can use this excellent water softener.
Pros
- Capable to remove iron from well water
- 3-regeneration mode available
- Customizable digital control head
- 5 years manufacturer warranty
- Perfect for medium to big families
Cons
- Complex control head settings may be difficult for some
Available Sizes of This Series:
Best Water Softeners to Remove Iron- GE gxsh40v
Product Features
- Dimensions: 22.44 X 14.44 X 47.63 inches
- Iron removal capacity: 7 ppm
- Water Flow Rate: 9.5 GPM
- Weight: 100 pounds
- Color: Gray
- Certification: NSF & CSA
- Warranty: 3 Years on control head, 10 years on tanks
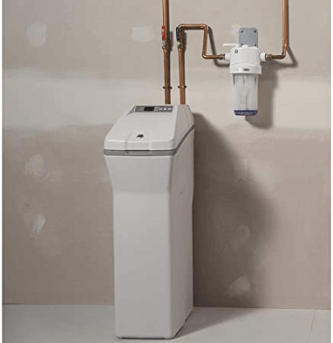
GE gxsh40v is a reliable and high performing water softener. It is also a great water softener that can remove iron from your well water. If you are looking for the best water softener to solve your hard water and iron issues, then you can choose it.
This water softener is capable to remove hardness up to 95 GPG. So it is an ideal water softener for medium-hard water. The maximum iron-removal capacity of GE gxsh40v is 7 parts per million.
GE gxsh40v water softener provides a 9.5 GPM flow rate and it’s enough for a small to medium family. This economical water softener can save salt up to 34%. It also usage 35% less water at the regeneration period compared to regular type water softener.
The self-cleaning sediment filter is capable to filter-out small particles that enhance the lifespan of the softener system. GE gxsh40v water softeners are certified by NSF and CSA. So don’t worry about its quality.
This water softener comes with a 1-year limited warranty. The manufacturer provides 3 years warranty on electronic control head and 10 years on tanks.
Enjoy iron-free soft water with this excellent water softener.
Pros
- Excellent iron removal capacity
- Good water flow rate
- Uses less salt
- NSF & CSA certified
- Excellent warranty period
Cons
- Hardness removal capacity is low
PRO+AQUA Whole House Filter System for Well Water
Product Features
- Dimensions: 9.5 x 9.5 x 57 inches
- Weight: 91 Pounds
- Color: Black
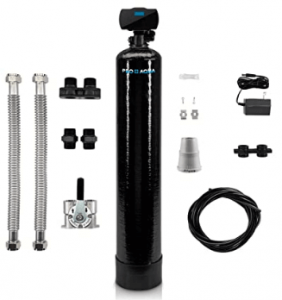
This water softener is specially built for well water and very effective at removing iron. PRO+AQUA whole house well water filter also eliminates hydrogen sulfide, heavy metals like lead, copper, arsenic, and radionuclides. This well water filter also features a 3-micron sediment filter that removes sediment, sand, rust, and many other contaminants.
PRO+AQUA Whole House Iron Filtration System comes with all equipment that needs to install it. The system includes a digital valve, 1-inch port stainless steel bypass, 1-inch port yoke, 1-inch male adaptors, two 18- inches flexible connectors, a media pressure tank, and a pre-filled media tank. You will also get an installation manual for easy installation.
This whole house iron filtration system comes with a hassle-free warranty of five years. PURA+AQUA also provides lifetime technical support for the system.
Pros
- A very efficient iron filtration system
- Removes also hydrogen sulfide, manganese, arsenic, and heavy metals
- USA made product
- Easy installation system
- Excellent warranty and lifetime technical support
Cons
- Doesn’t soften water
iSpring WGB32BM 3-Stage Whole House Water Filtration System
Product Features
- Dimesions: 21 X 8 X 28 inches
- Filtration Capacity: 100,000 Gallons
- Water Flow Rate: 15 GPM
- Weight: 3.06 Pounds
- Iron Removal Capacity: 3 ppm
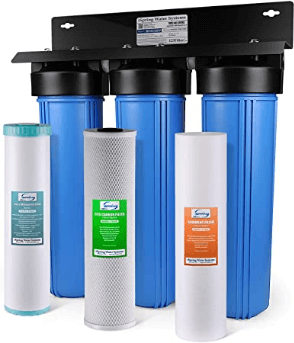
The WGB32BM 3-stage whole house water filtration system is great to remove iron from home water. 3 stage filtration system of this model makes the water soft and clean. This filtration system is designed for removing iron and manganese from water. The iSpring WGB32BM is quite capable to remove iron up to 3 ppm and manganese 1 ppm.
The first stage of this filtration system removes large contaminants. The 2nd filtration stage is made of coconut shell for highest efficiency. This stage removes various contaminants like chlorine, sediments, rust, herbicides, pesticides, and industrial diluents.
The iSpring WGB32BM is a whole house filtration system. So, you can install it at the main water supply line in your home.
This system doesn’t remove dissolve solids from water. So, you will get essential minerals in your drinking water. It’s also an NSF certified whole house filtration system.
The filtering capacity of this system is 100,000 Gallons of water and it’s enough to supply for a family of 3-4 for a year. The WGB32BM requires minimum maintenance and comes with all equipment for easy installation.
Pros:
- Very effective to remove iron
- Doesn’t remove useful minerals from water
- High water flow rate
- Easy installation system
- NSF certified
Cons
- Not perfect for very hard water
Aquasna Rhino Whole House Well Water Filter with Softener System
Product Features
- Size: 500,000 Gallon
- Flow rate: 7 GPM
- Dimensions: 65×57 inches
- Weight: 115 pounds
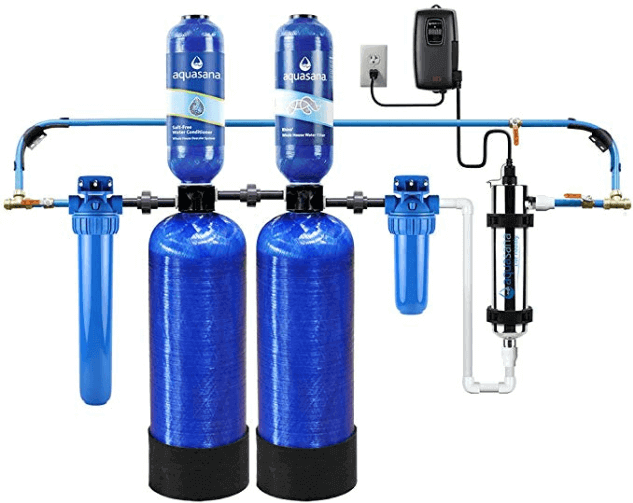
Aquasana Rhino Whole House Well Water Filter with Softener is a complete water treatment system. It is one of the best salt-free water softeners on the market. This Softener system can significantly remove hard minerals and iron from your home water.
This water softener and filter can destroy viruses, bacteria, and chlorine resistant cysts by using its UV filtration system. Some features of this product make it very attractive. Aquasana does not reduce the total dissolved solids from the water. The system uses salt-free scale control media (SCM) to prevent scale build-up into the plumbing pipe. The SCM softening system coated the minerals and prevents them to attach with any surface.
Its carbon filtration system can remove carbon compounds from water and improve the taste. Aquasana Rhino whole house water filter use media called KDF-85. This media is the granule form of copper and zinc. These granules exchange electron with ferrous cations and transform them into insoluble ferric hydroxide. This media also can turn dissolved sulfur and manganese into solid form and then filtered out from water.
Aquasana Rhino Whole House Well Water Filter with Softener is easy to install. You can use it for better water for your home.
Read also “Good Housekeeping Water Softener for City Water”.
Best Water Softeners to Remove Iron: Why Should We Use Best One
The water hardness is one of the big problems in the world especially in the USA. If it is accompanied by high levels of iron, the problem is exacerbated. So, water softener is a must needed home appliance for well water users. Let’s know in detail why it is important-
To Remove/Reduce Hard Water Effects
The minerals in the water is not harmful for our body though some expert advice to avoid it. Anyway, hard water has a lot of negative effects and we must use a water softening system to avoid excess minerals and iron.
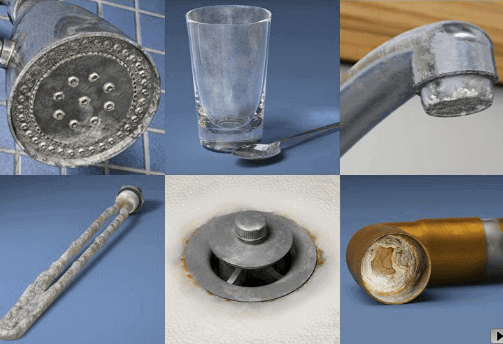
- Heavy presence of hard minerals in the water can damage your precious home appliances. Hard minerals leave cloudy films on appliances when it dries. It’s a familiar sign to those, who are using hard water. These cloudy spots take away the shiny look of glass wares. Frequently using of hard minerals can shorten the lifespan of appliances.
- Presence of excess minerals and iron can build up substance in the pipe and on the shower head. It clogs the pipe in many cases. This will affect on the whole water supply system of your home.
- Hard water also causes skin irritation and eczema. It can also damage our hair and skin. When we use soap or shampoo, they don’t dissolve fully in hard water. As a result, after washing again and again hard minerals remain on skin and hair. These minerals can lead to skin irritation and hair damage.
- Hard water also reduces the efficiency of many appliances like water heater, cattle, cloth washer etc.
Standard Hardness Level in Well Water
Water hardness is the result of appearing too many minerals in well water. Especially, calcium and magnesium ion is the culprit for causing water hardness. But, these minerals are not a health hazard and have no harmful effect. That’s why U.S Environmental Protection Agency(EPA) has not set any standard level for water hardness. However, water hardness classified into 4-levels
i) Soft Water: 0-60 mg/L calcium carbonate
ii) Moderately Hard Water: 61-120 mg/L calcium carbonate
iii) Hard Water: 121-180 mg/L calcium carbonate
iv) Very Hard Water: More than 180 mg/L of calcium carbonate
Best Water softeners to Remove Iron: How to Choose?
You should consider some important things before buying the best water softeners to remove iron of your home. What should you consider? Take a look-
i. Types of Water Softener
There are two popular types of water softeners: salt-based water softener and salt-free water softener. The salt-based system uses salt to soften water. On the other hand, salt-free systems use different softening methods like coating, crystallization, etc. Actually, salt-free systems don’t remove hard minerals from water. They coat or crystalize the hard minerals and prevent to attach with any surface. That means, they remove only the negative effects of hard water, not minerals.
Most of the well water users like salt-based water softener because they are more effective than salt-free ones. Iron contamination also a common problem for well water users. We recommend you buy the fleck iron pro-2 combination water softener for the best performance
ii. Grain/Filtration Capacity
This is another important issue that should consider when buying a water softener. If the grain capacity is less than you need, it will not be able to provide you with continuous soft water. The GRAIN is the measure of the ability of any salt-based water softener. The salt-free systems calculate capacity in gallons.
So, choose an appropriate size that can meet your need.
iii. Water Flow Rate
Select the appropriate flow rate depending on the amount of water you and your family use at the same time. We do not recommend any water softener with a flow rate of less than 10 GPM. Remember, the low flow rate is one of the main reasons for clogging the pipe.
iv. Budget
Budget is an important issue when you want to buy a water softener. Though, it will depend on some factors like the type, size, features, and brand of your desired water softener. We suggest not buying a cheaper one for your home. You can get an efficient water softener ranging from $500 to $1500. Installation, buying softening agent, and maintenance will be added as additional costs.
v. Prefilter of Water Softener
The pre-filtering system is not mandatory for water softening. But, when it comes to removing iron from well water, you need a water softener that features a pre-filter. Featuring a pre-filter will improve the quality of water. It also enhances the lifetime of your water softener. So, analyze your home water. And, then decide whether you want to buy water softener with or without prefilter.
vi. Ph Level of Water
Before buying a softening system, you should test the Ph level of your water. If the PH level is above 7, then buy an alternative system to treat your water. Because alkaline water contains much ferric iron (known as red-water iron). And, a conventional water softener can’t remove it properly.
vii. Metered or Timer Based Control
Before buying, it’s an important task to know well about the controlling system of your desired water softener. Is it features metered or timer controlling system? Meter-based water softener regenerates after a certain amount of water. On the other hand, the timer-based softening system regenerates after a certain period. Both types of water softeners have some advantages and disadvantages too. You have to choose the perfect type of water softener that will be efficient for your home.
viii. Separate or Combined Water Softener Unit
Some water softener manufacturing companies produce combined water softening units. There, brine and a resin tank take place in one unit. Whirlpool, GE, and many other companies produce these types of water softeners. Combined water softeners are space-saving and also perform well as separate water softeners.
As opposed to combined water softener features a brine and resin tank separately. Most water softener brands produce these types of water softeners. However, take the type that suits your home.
ix. Warranty and Technical Support
A warranty is nothing, but it will increase your confidence level. The warranty also increases the reliability of any product. So, choose a water softener that comes with a standard warranty. On the other hand, technical support needs for installing your water softener unit. It is also necessary to solve any problem during use. So, don’t ignore these considerations when you want to buy a water softener for your home.
Comparison of Salt-free and Salt-based Water Softener
A salt-free and salt-based water softener have lots of differences. Indeed, the way they work is different. Let’s see the comparison between salt-free and salt-based water softeners-
Salt-free Water Softener
A salt-free water softener doesn’t use any salt. Instead of removing the minerals, they coat or transform them only. As a result, hard-causing minerals (calcium or magnesium) can,t attach to any surface. The reality is that salt-free water softener eliminates the effects of hard water, not minerals.
Salt-based Water Softener
The salt-based system is the actual type of water softener. These are also known as ion-exchange softening systems. These salt-based water softeners use salt to exchange hard minerals from water.
Best Water Softeners to Remove Iron: Top Selection
All the water softeners described in our article are capable of removing iron. So, which of them is the best? It depends on the specific needs and impurities of your water. Each system has its own softening and filtration method. So, choose a water softener from them to enjoy pure and safe water. You might understand that it’s your necessity, not an option. However, we have selected the best one from our list to help your picking easy. And the winner is the AFW filters iron pro-2 combination water softener. Let’s know why iron pro-2 is the best for iron-contaminated water.
- One of the best-specialized water softeners for removing iron from well water
- Removes iron up to 6ppm
- Reasonable price
- Treats 16 grains hardness per minute
- Fine Mesh Resin for iron removal and long-lasting
- Features cost-efficient meter-based regeneration system
- Comes with a 5-years warranty on the control head
- 30-day satisfaction guarantee
Salt-based Water Softener Installation Guide
Most water softener manufacturing companies provide installation guides to make the job easy. Every water softener has its installation process. However, here are some common steps for installing a salt-based water softener.
Step 1
Before starting the installation process, read the water softener manual properly that comes with your water softener system.
Step 2
Shut off the main switch of the water supply.
Step 3
Turn on all outside hoses and faucets to drain all the water present in the plumbing pipe.
Step 4
Select a leveled, dry, and safe area to position your water softener. If your water softener has two tanks(brine and resin tank), set them near each other.
Step 5
Then, you have to set three valves-
a) Prior valve to control entering water
b) After valve for exiting the water
c) And the last one is for maintenance purposes
Step 6
Make sure all the fittings are well connected. If you need to solder them, then do so.
Step 7
Connect the tanks with provided tubing line. If not, buy the connecting tubes from a nearby hardware store.
Step 8
After that, connect the draining line
Step 9
Finally, switch on the main switch of the water supply.
Water Softener Maintenance Guide
For maintenance, visit our article on Water Softener Maintenance and Troubleshooting Guide.
Effects of Too Much Iron in Water
Iron is not a health hazard for us. It is an essential mineral for animals and helps to transport oxygen in the blood. But excess iron in water creates a lot of problems.
Iron Changes the Taste of Food
Dissolve ferrous iron in your water can change the taste of your food. It also combines with your drinks like tea, coffee or beverages and produces inky liquid and change the taste.
Spots and Deposits
Low concentrated iron contaminated water can create reddish spots on fixtures, bathtubs, and laundry. These spots are very difficult to remove. It also can deposit inside the plumbing system and clog the pipe.

Bacterial Growth in Iron Contaminated Water
Certain kinds of bacteria use iron to survive themselves. They attach with iron and form smelly biofilms. They leave reddish or yellow sludge that causes bad smell and can clog the plumbing pipes.
Different Forms of Iron
Iron in water appears in two common forms. i) Ferric Iron ii) Ferrous Iron
Ferric Iron
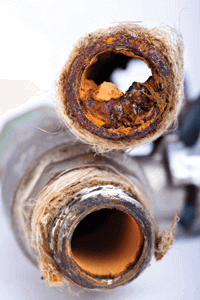
It is called red-water iron. Orangey-red colored water proves the presence of ferric iron in water. It reacts with the oxygen and forms visible rust and makes the water reddish color.
Ferrous Iron
Ferrous iron is called clear-water iron. We can’t see it in open eyes because of its invisible characteristics. Naturally, it comes with deep well water.
Acceptable iron levels in well water
Iron is an essential element for us. It helps to transport oxygen in our blood. The present acceptable iron level in water is 0.3 mg/l. When it exceeds the level we face many problems. Excess iron in water causes stains of clothes, dishes, glassware, showerhead, bathtubs, and sinks.
Best Water Softeners to Remove Iron: FAQs
1. How does a Water Softener Work?
Water hardness is the result of too many minerals present in the water. A water softener removes these by using the ion-exchange method. For this, water softeners feature two different parts. One is a resin tank(or part), and the other is a brine tank. Negatively charged resin exchange with positively charged mineral ions. After a certain period of ion exchange, resin beads regenerate with brine solution. And the cycle repeats itself to eliminate water hardness.
2. Is Soft Water Good for Health?
For information, hard water is no health hazard. It has some negative effects on plumbing systems and appliances. On the other hand, soft water contains lower minerals but excess sodium ions for using the brine in softening process.
3. Does a Water Softener Remove Iron from Well Water?
Yes, water softeners can remove iron from well water.
4. Do I need a Professional Plumber to Install my Water Softener?
Hiring a professional plumber to install a water softener is not mandatory. Most water softeners come with an installation guide. You can install your water softener by following these instructions. But, you need some basic knowledge of plumbing to do the job successfully.
5. How Long Does an Iron Filter Last?
An iron filter can last up to 20 years. However, it depends on the quality of the water softener. Also, water quality and hardness affect the longevity of the iron filter.
Best Water Softeners to Remove Iron: Conclusion
We are at the end of our tour the best water softeners to remove iron. We have tried our best to help you to select the best iron removal water softener. If you think this article is helpful then share it with your friends. Thanks a lot for reading this article.

